开源大模型 Llama 实战
去年 2 月 24 日,Facebook 的母公司 Meta AI 推出 Llama 语言模型,该模型完全使用公开可用的数据集进行训练,拥有 70 亿到 650 亿个参数,包括 7B、13B、30B 和 65B 四个版本,可以进行本地部署和微调训练,非常适合个人和中小型企业。
值得注意的是,Llama 以非商业授权的形式发布,主要用于学术研究,官方仓库 里只给出了加载模型的示例代码,想要获取核心模型权重,还需要填写一份表单进行申请。尽管如此,Llama 模型的发布也具有划时代的意义,由于 OpenAI 对于 GPT-2 之后的模型就不再开源,这个时候 Meta 推出的 Llama 补上了这个缺口,掀起了开源大模型的发展浪潮。
3 月 13 日,斯坦福大学发布了指令精调模型 Alpaca 7B,它通过 OpenAI 的 text-davinci-003 模型生成了 5.2 万指令数据,然后对 Llama 7B 进行精调而得。
3 月 16 日,Guanaco 问世,它在 Alpaca 基础上补充了多语种语料和指令任务。
3 月 23 日,中文小羊驼 Chinese-Vicuna 面世,它基于 Llama 模型和 LoRA 方案,可按需投喂数据进行个性化指令精调。
3 月 24 日,Databricks 发布 Dolly 模型,它本质是 Alpaca 的开源克隆,基于 GPT-J-6B 精调,旨在证明精调指令数据比底座模型更为重要。
3 月 25 日,来自华中师范大学和商汤的几位伙伴发起中文大语言模型开源项目 骆驼(Luotuo),包含了一系列大语言模型、数据、管线和应用。
3 月 28 日,中文 LLaMA & Alpaca 大模型发布,包括了中文 Llama 模型和指令精调的 Alpaca 模型;中文 Llama 模型在原版 Llama 的基础上扩充了中文词表并使用了中文数据进行二次预训练,进一步提升了中文基础语义理解能力;同时,中文 Alpaca 模型进一步使用了中文指令数据进行精调,显著提升了模型对指令的理解和执行能力。
3 月 30 日,来自加州大学伯克利分校、卡内基梅隆大学、斯坦福大学、加州大学圣地亚哥分校的几位计算机博士成立 LMSYS 组织,并发布了 Vicuna-13B,它基于 ShareGPT 收集的对话对 Llama 进行精调,仅需 300 美元即完成训练,号称达到了 ChatGPT 90% 的能力。
同月,智谱 AI 开源了 ChatGLM-6B 模型,这是一个开源的、支持中英双语的对话语言模型,基于 GLM 架构,具有 62 亿参数,使用了和 ChatGPT 相似的技术,针对中文问答和对话进行了优化。
6 月 7 日,上海 AI 实验室发布了开源多语言大型语言模型 InternLM-7B,中文名书生·浦语,在 1.6 万亿标记的大型语料库上进行预训练,采用多阶段渐进式的过程,然后进行了微调以与人类偏好对齐。
6 月 15 日,百川智能发布了开源可商用的大规模预训练语言模型 Baichuan-7B,基于 Transformer 结构,在大约 1.2 万亿 tokens 上训练的 70 亿参数模型,支持中英双语。
开源大模型如雨后春笋般冒了出来,层出不穷,到了 7 月,Meta AI 联合 Microsoft 又推出了 Llama 2 模型,将预训练语料库的大小增加了 40%,将模型的上下文长度增加了一倍,并采用了分组查询注意力,参数范围从 70 亿到 700 亿,包括 7B、13B 和 70B 三个版本。同时还发布了 Llama 2 的微调版本 Llama 2-Chat,专门针对聊天场景进行了优化。
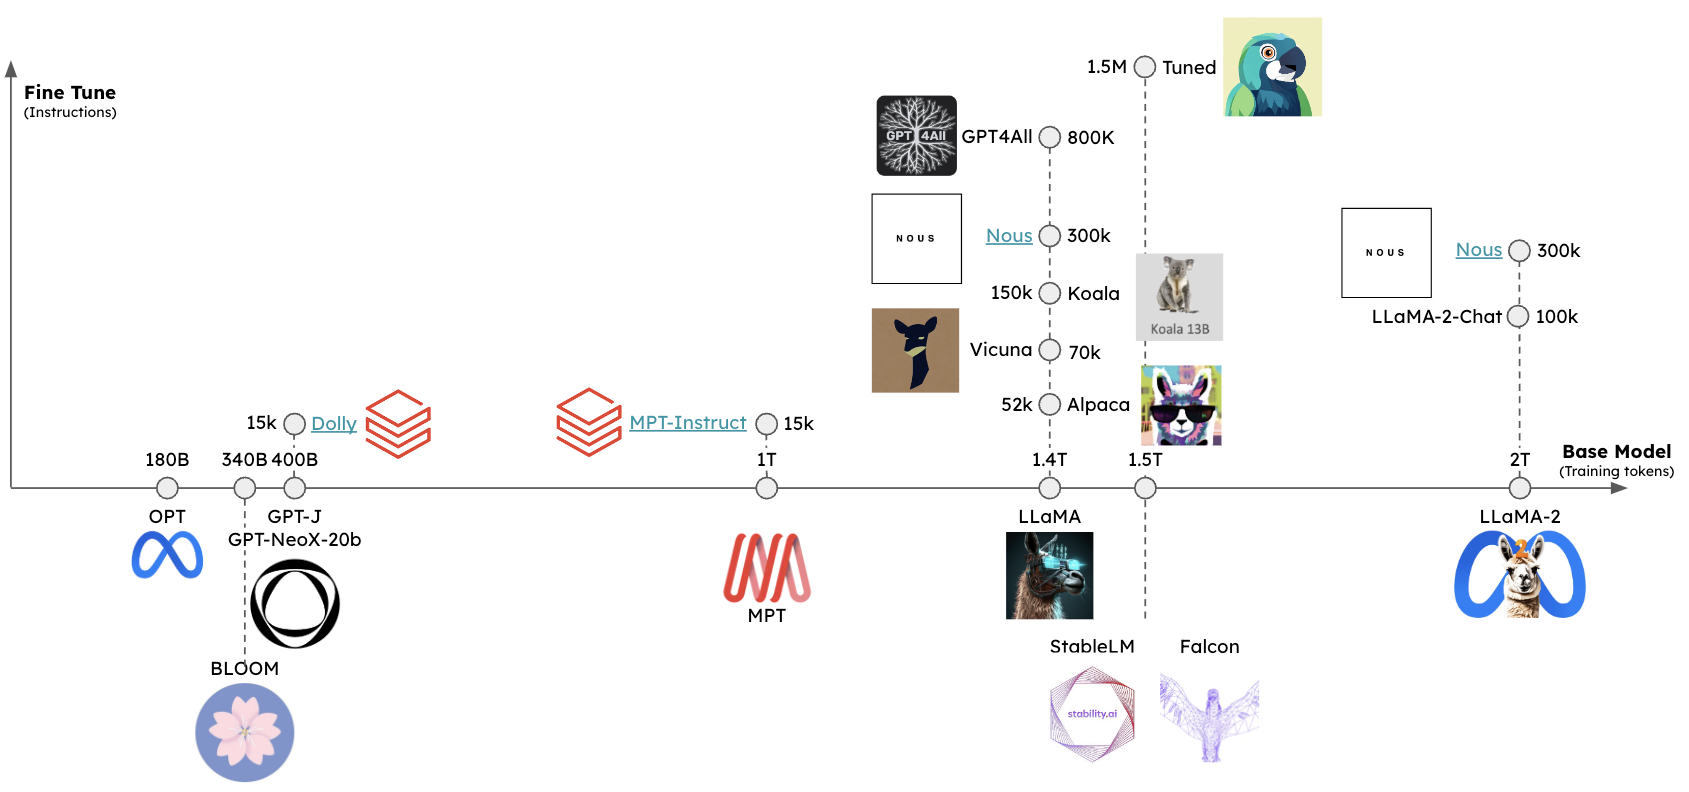
模型下载
想要体验 Llama 模型,我们首先得把模型给下载下来,这里总结几种不同的下载方法。
官方版本下载
根据官方仓库的说明,我们需要填写一份表单进行申请:
当申请通过后,你会收到一份带有下载链接的邮件。然后下载 Llama 仓库的源码,执行其中的 download.sh 脚本:
$ git clone https://github.com/meta-llama/llama.git
$ cd llama
$ ./download.sh
Enter the URL from email:
按提示输入邮件中的下载链接即可。
值得注意的是,这个下载脚本依赖于 wget 和 md5sum 命令,确保你的系统上已经安装了下面这两个工具:
$ brew install wget md5sha1sum泄露版本下载
如果嫌从官方下载太麻烦,网上也有一些泄露的模型版本可以直接下载。
这里 应该是最早泄漏的版本,可以使用 IPFS 客户端 进行下载。
社区里也有人制作了种子,可以使用 BitTorrent 下载,磁链地址为 magnet:?xt=urn:btih:ZXXDAUWYLRUXXBHUYEMS6Q5CE5WA3LVA&dn=LLaMA。
使用 pyllama 下载
另一种下载 Llama 模型的方法是使用 pyllama 库。首先,通过 pip 安装它:
$ pip3 install transformers pyllama -U然后通过下面的命令下载 Llama 7B 模型(根据需要你也可以下载 13B、30B 和 65B,如果不指定 --model_size 则下载所有):
$ python3 -m llama.download --model_size 7B在 Mac M2 下可能会遇到下面这样的报错:
ImportError: dlopen(/Library/Python/3.9/site-packages/_itree.cpython-39-darwin.so, 0x0002):
    tried: '/Library/Python/3.9/site-packages/_itree.cpython-39-darwin.so'
    (mach-o file, but is an incompatible architecture (have 'x86_64', need 'arm64')),
    '/System/Volumes/Preboot/Cryptexes/OS/Library/Python/3.9/site-packages/_itree.cpython-39-darwin.so'
    (no such file),
    '/Library/Python/3.9/site-packages/_itree.cpython-39-darwin.so'
    (mach-o file, but is an incompatible architecture (have 'x86_64', need 'arm64'))
根据 itree 的官方文档,这个库我们需要自己手动构建:
$ brew install cmake
$ pip3 install https://github.com/juncongmoo/itree/archive/refs/tags/v0.0.18.tar.gz
安装完成后,再次下载,这次虽然没有报错,但是模型的下载目录 pyllama_data 却是空的,根据 这里 的解决方案,我们使用源码重新安装 pyllama:
$ pip3 uninstall pyllama
$ git clone https://github.com/juncongmoo/pyllama
$ pip3 install -e pyllama
然后再次下载即可,7B 模型文件大约 13G,下载速度取决于你的网速,成功后输出如下:
$ python3 -m llama.download --model_size 7B
❤️  Resume download is supported. You can ctrl-c and rerun the program to resume the downloading

Downloading tokenizer...
✅ pyllama_data/tokenizer.model
✅ pyllama_data/tokenizer_checklist.chk
tokenizer.model: OK

Downloading 7B

downloading file to pyllama_data/7B/consolidated.00.pth ...please wait for a few minutes ...
✅ pyllama_data/7B/consolidated.00.pth
✅ pyllama_data/7B/params.json
✅ pyllama_data/7B/checklist.chk

Checking checksums for the 7B model
consolidated.00.pth: OK
params.json: OK
一共有 5 个文件:
$ tree pyllama_data
pyllama_data
|-- 7B
|   |-- checklist.chk
|   |-- consolidated.00.pth
|   `-- params.json
|-- tokenizer.model
`-- tokenizer_checklist.chk

2 directories, 5 files
模型推理
从下载文件 consolidated.00.pth 的后缀可以看出这是一个 PyTorch 中用于保存模型权重的文件,该文件包含了模型在训练过程中学到的权重参数,我们可以通过 PyTorch 提供的加载机制重新装载到相同或者相似结构的模型中,从而继续训练或者进行推理。
官方已经提供了这样的示例代码,可以对模型进行测试,我们先下载代码:
$ git clone https://github.com/meta-llama/llama.git
$ cd llama
$ git checkout llama_v1
注意切换到 llama_v1 分支,因为我们下的是 Llama 1 模型。然后安装所需依赖:
$ pip3 install -r requirements.txt然后安装 Llama:
$ pip3 install -e .最后运行下面的命令测试模型:
$ torchrun --nproc_per_node 1 example.py --ckpt_dir ../pyllama_data/7B --tokenizer_path ../pyllama_data/tokenizer.model运行这个命令需要具备 NVIDIA 卡并且需要安装 CUDA,否则很可能会报下面这样的错:
Traceback (most recent call last):
  File "/Users/aneasystone/Codes/github/llama/example.py", line 119, in <module>
    fire.Fire(main)
  File "/Library/Python/3.9/site-packages/fire/core.py", line 141, in Fire
    component_trace = _Fire(component, args, parsed_flag_args, context, name)
  File "/Library/Python/3.9/site-packages/fire/core.py", line 475, in _Fire
    component, remaining_args = _CallAndUpdateTrace(
  File "/Library/Python/3.9/site-packages/fire/core.py", line 691, in _CallAndUpdateTrace
    component = fn(*varargs, **kwargs)
  File "/Users/aneasystone/Codes/github/llama/example.py", line 74, in main
    local_rank, world_size = setup_model_parallel()
  File "/Users/aneasystone/Codes/github/llama/example.py", line 23, in setup_model_parallel
    torch.distributed.init_process_group("nccl")
  File "/Library/Python/3.9/site-packages/torch/distributed/c10d_logger.py", line 86, in wrapper
    func_return = func(*args, **kwargs)
  File "/Library/Python/3.9/site-packages/torch/distributed/distributed_c10d.py", line 1184, in init_process_group
    default_pg, _ = _new_process_group_helper(
  File "/Library/Python/3.9/site-packages/torch/distributed/distributed_c10d.py", line 1302, in _new_process_group_helper
    raise RuntimeError("Distributed package doesn't have NCCL built in")
RuntimeError: Distributed package doesn't have NCCL built in
在深度学习的训练和推理过程中,我们常常会遇到单机多卡或多机多卡的情况,这就会涉及到各个卡或节点之间的通信,这种通信被称为 集合通信(Collective Communication),而 NCCL 就是这样的一个集合通信库,它是英伟达基于自家 NVIDIA GPU 定制开发的一套开源集合通信库,可以通过 PCIe 和 NVLink 等高速互联从而实现高带宽和低延迟。除了 NCCL,还有一些其他的库可以选择,比如 MPI 接口的开源实现 Open MPI 、Facebook 的 Gloo 等。
为了让代码能在我的 Mac 上跑起来,我参考了 这里 和 这里 的方法,将代码中和 CUDA 有关的内容都删掉,虽然可以运行,模型也显示加载成功了,但是却一直没有运行结果。最后,参考网友 b0kch01 的实现,还需要对参数做一些修改,然后将代码改成一次只处理一个提示词,再将机器上所有程序全部关闭,终于把 Llama 模型运行起来了:
$ torchrun --nproc_per_node 1 example.py --ckpt_dir ../pyllama_data/7B --tokenizer_path ../pyllama_data/tokenizer.model
Locating checkpoints
Found MP=1 checkpoints
Creating checkpoint instance...
Grabbing params...
Loading model arguments...
Creating tokenizer...
Creating transformer...

-- Creating embedding
-- Creating transformer blocks (32)
-- Adding output layers
-- Precomputing frequencies

Loading checkpoint to model...done in 57.88 seconds
Creating LLaMA generator...done in 0.01 seconds
Loaded in 89.92 seconds
Enter prompt:
等了 90 秒,模型加载成功,接着我们手动输入示例中的第一个提示词:
Enter prompt: I believe the meaning of life is
Starting generation with prompt: I believe the meaning of life is
Forwarding 38 times
responded in 472.85 seconds
I believe the meaning of life is to fulfill your purpose in life, and once you’ve done that, you live to serve others and to love others.
My goal is

==================================

Enter next prompt:
又等了将近 8 分钟,模型才慢吞吞地输出 150 个左右的字符。
模型量化
可以看到,就算是最小的 7B 模型,在一般的个人电脑上跑起来也是相当费劲。一般来说,基础模型都是 16 位浮点精度的,或称为 FP16 模型,也就是说,模型的每个参数都需要一个 16 位浮点数(2 字节)来保存,所以模型权重的体积和推理所需的显存大小约为模型参数量的两倍,比如运行 Llama 7B 大约需要 14GB 的显存。
目前有很多方法在研究如何减少大模型的资源占用,例如 llama.cpp,号称可以在树莓派上进行推理,最低只需要 4G 内存。这种技术也被称为 量化(Quantization),通过降低权重的精度,可以很大程度上降低显存要求,加快推理速度,同时保持大部分模型的性能。以 4 Bit 量化为例,它将原本的 16 位浮点精度压缩为 4 位整数精度,使模型权重的体积减小到原本的 1/4,推理所需显存也大幅减少,意味着约 4GB 左右的显存就可以对 7B 模型进行推理。
常见的量化技术有:NF4、GPTQ 和 GGML 等,对量化原理感兴趣的同学可以参考 Introduction to Weight Quantization 这篇文章。
使用 llama.cpp 量化并运行 Llama 模型
想要在个人电脑上玩转大模型,首推 llama.cpp 项目,它使用 C/C++ 重写了 Llama 的推理代码,不仅避免了 PyTorch 引入的复杂依赖,而且对各类硬件和库提供了广泛的支持,比如支持纯 CPU 推理,支持 Apple Silicon 芯片,支持不同的操作系统,包括 Mac OS、Linux、Windows、Docker、FreeBSD 等,还支持大量的开源大模型,包括 Meta 的 Llama、Google 的 Gemma、Mistral AI 的 Mistral 系列、阿里的 Qwen 系列、零一万物的 Yi 系列等。
首先我们下载 llama.cpp 的源码:
$ git clone https://github.com/ggerganov/llama.cpp
$ cd llama.cpp
官方提供了很多种不同的编译方法,包括 make、CMake 和 Zig 等,你可以根据你的喜好进行选择。另外,它还支持苹果的 Metal 框架、不同的消息传递接口 MPI 实现,比如 MPICH 和 Open MPI 以及大量的 BLAS 库,具体的编译选项可以 参考官方文档。我们这里直接使用 make 命令编译:
$ make在 Mac 上编译无需额外参数,llama.cpp 已经对 Arm Neon 做了优化,会自动启动 BLAS,在 M 系列芯片上,还会自动使用 Metal 框架,显著提升 GPU 推理速度。
编译完成后会在当前目录生成一些可执行文件,比如:
main- 用于模型推理的主程序quantize- 用于模型量化server- 以服务器模式运行
不过此时我们还无法直接运行推理程序,llama.cpp 不支持 PyTorch 格式的模型文件,我们需要将其转换为 GGUF 格式,在之前的版本中叫做 GGML 格式,它是由 Georgi Gerganov 创建的一种独特的二进制格式,用来分发语言模型文件,GG 就是他名字的缩写,同时他也是 llama.cpp 的作者。
将模型转换成这种格式非常简单,在 llama.cpp 的源码里已经内置了 convert.py 脚本,直接执行该脚本即可:
$ pip3 install -r requirements.txt
$ python3 convert.py ../pyllama_data/7B
转换完成后,模型目录下会多一个 ggml-model-f16.gguf 文件:
$ ls -lh ../pyllama_data/7B
total 52679296
-rw-r--r--@ 1 aneasystone  staff   100B Mar  5  2023 checklist.chk
-rw-r--r--@ 1 aneasystone  staff    13G Mar  5  2023 consolidated.00.pth
-rw-r--r--@ 1 aneasystone  staff    13G Mar 24 15:33 ggml-model-f16.gguf
-rw-r--r--@ 1 aneasystone  staff   101B Mar  5  2023 params.json
这个文件和之前的模型文件一样,还是很大,接着我们使用 quantize 程序对模型文件进行量化,量化的尺寸可以选择 8 Bit、4 Bit 或 2 Bit 等,不同的尺寸在效果和资源占用上存在差异。我们这里选择的是 Q4_K_M,这是一种既能保留大部分模型的性能又能节约内存的量化类型。运行命令如下:
$ ./quantize ../pyllama_data/7B/ggml-model-f16.gguf ../pyllama_data/7B/ggml-model-Q4_K_M.gguf Q4_K_M除此之外,下面是该命令支持的所有量化类型:
Allowed quantization types:
   2  or  Q4_0    :  3.56G, +0.2166 ppl @ LLaMA-v1-7B
   3  or  Q4_1    :  3.90G, +0.1585 ppl @ LLaMA-v1-7B
   8  or  Q5_0    :  4.33G, +0.0683 ppl @ LLaMA-v1-7B
   9  or  Q5_1    :  4.70G, +0.0349 ppl @ LLaMA-v1-7B
  19  or  IQ2_XXS :  2.06 bpw quantization
  20  or  IQ2_XS  :  2.31 bpw quantization
  28  or  IQ2_S   :  2.5  bpw quantization
  29  or  IQ2_M   :  2.7  bpw quantization
  24  or  IQ1_S   :  1.56 bpw quantization
  10  or  Q2_K    :  2.63G, +0.6717 ppl @ LLaMA-v1-7B
  21  or  Q2_K_S  :  2.16G, +9.0634 ppl @ LLaMA-v1-7B
  23  or  IQ3_XXS :  3.06 bpw quantization
  26  or  IQ3_S   :  3.44 bpw quantization
  27  or  IQ3_M   :  3.66 bpw quantization mix
  12  or  Q3_K    : alias for Q3_K_M
  22  or  IQ3_XS  :  3.3 bpw quantization
  11  or  Q3_K_S  :  2.75G, +0.5551 ppl @ LLaMA-v1-7B
  12  or  Q3_K_M  :  3.07G, +0.2496 ppl @ LLaMA-v1-7B
  13  or  Q3_K_L  :  3.35G, +0.1764 ppl @ LLaMA-v1-7B
  25  or  IQ4_NL  :  4.50 bpw non-linear quantization
  30  or  IQ4_XS  :  4.25 bpw non-linear quantization
  15  or  Q4_K    : alias for Q4_K_M
  14  or  Q4_K_S  :  3.59G, +0.0992 ppl @ LLaMA-v1-7B
  15  or  Q4_K_M  :  3.80G, +0.0532 ppl @ LLaMA-v1-7B
  17  or  Q5_K    : alias for Q5_K_M
  16  or  Q5_K_S  :  4.33G, +0.0400 ppl @ LLaMA-v1-7B
  17  or  Q5_K_M  :  4.45G, +0.0122 ppl @ LLaMA-v1-7B
  18  or  Q6_K    :  5.15G, +0.0008 ppl @ LLaMA-v1-7B
   7  or  Q8_0    :  6.70G, +0.0004 ppl @ LLaMA-v1-7B
   1  or  F16     : 13.00G              @ 7B
   0  or  F32     : 26.00G              @ 7B
          COPY    : only copy tensors, no quantizing
这时,模型目录下应该会生成一个 ggml-model-Q4_K_M.gguf 文件:
$ ls -lh ../pyllama_data/7B
total 60674720
-rw-r--r--@ 1 aneasystone  staff   100B Mar  5  2023 checklist.chk
-rw-r--r--@ 1 aneasystone  staff    13G Mar  5  2023 consolidated.00.pth
-rw-r--r--@ 1 aneasystone  staff   3.8G Mar 24 15:38 ggml-model-Q4_K_M.gguf
-rw-r--r--@ 1 aneasystone  staff    13G Mar 24 15:33 ggml-model-f16.gguf
-rw-r--r--@ 1 aneasystone  staff   101B Mar  5  2023 params.json
为了节约时间,我们也可以从 TheBloke 这里下载已经量化好的模型直接使用。
相比于原文件,这个模型文件减小了很多,只有 3.8G,接下来就可以使用 main 对其进行推理了:
$ ./main -m ../pyllama_data/7B/ggml-model-Q4_K_M.gguf -n 128 -p "I believe the meaning of life is"
Log start
main: build = 2518 (ddf65685)
main: built with Apple clang version 15.0.0 (clang-1500.0.40.1) for arm64-apple-darwin22.6.0
main: seed  = 1711266065
llama_model_loader: loaded meta data with 17 key-value pairs and 291 tensors from ../pyllama_data/7B/ggml-model-Q4_K_M.gguf (version GGUF V3 (latest))
llama_model_loader: Dumping metadata keys/values. Note: KV overrides do not apply in this output.
llama_model_loader: - kv   0:                       general.architecture str              = llama
llama_model_loader: - kv   1:                               general.name str              = pyllama_data
llama_model_loader: - kv   2:                           llama.vocab_size u32              = 32000
llama_model_loader: - kv   3:                       llama.context_length u32              = 2048
llama_model_loader: - kv   4:                     llama.embedding_length u32              = 4096
llama_model_loader: - kv   5:                          llama.block_count u32              = 32
llama_model_loader: - kv   6:                  llama.feed_forward_length u32              = 11008
llama_model_loader: - kv   7:                 llama.rope.dimension_count u32              = 128
llama_model_loader: - kv   8:                 llama.attention.head_count u32              = 32
llama_model_loader: - kv   9:              llama.attention.head_count_kv u32              = 32
llama_model_loader: - kv  10:     llama.attention.layer_norm_rms_epsilon f32              = 0.000001
llama_model_loader: - kv  11:                          general.file_type u32              = 15
llama_model_loader: - kv  12:                       tokenizer.ggml.model str              = llama
llama_model_loader: - kv  13:                      tokenizer.ggml.tokens arr[str,32000]   = ["<unk>", "<s>", "</s>", "<0x00>", "<...
llama_model_loader: - kv  14:                      tokenizer.ggml.scores arr[f32,32000]   = [0.000000, 0.000000, 0.000000, 0.0000...
llama_model_loader: - kv  15:                  tokenizer.ggml.token_type arr[i32,32000]   = [2, 3, 3, 6, 6, 6, 6, 6, 6, 6, 6, 6, ...
llama_model_loader: - kv  16:               general.quantization_version u32              = 2
llama_model_loader: - type  f32:   65 tensors
llama_model_loader: - type q4_K:  193 tensors
llama_model_loader: - type q6_K:   33 tensors
llm_load_vocab: special tokens definition check successful ( 259/32000 ).
llm_load_print_meta: format           = GGUF V3 (latest)
llm_load_print_meta: arch             = llama
llm_load_print_meta: vocab type       = SPM
llm_load_print_meta: n_vocab          = 32000
llm_load_print_meta: n_merges         = 0
llm_load_print_meta: n_ctx_train      = 2048
llm_load_print_meta: n_embd           = 4096
llm_load_print_meta: n_head           = 32
llm_load_print_meta: n_head_kv        = 32
llm_load_print_meta: n_layer          = 32
llm_load_print_meta: n_rot            = 128
llm_load_print_meta: n_embd_head_k    = 128
llm_load_print_meta: n_embd_head_v    = 128
llm_load_print_meta: n_gqa            = 1
llm_load_print_meta: n_embd_k_gqa     = 4096
llm_load_print_meta: n_embd_v_gqa     = 4096
llm_load_print_meta: f_norm_eps       = 0.0e+00
llm_load_print_meta: f_norm_rms_eps   = 1.0e-06
llm_load_print_meta: f_clamp_kqv      = 0.0e+00
llm_load_print_meta: f_max_alibi_bias = 0.0e+00
llm_load_print_meta: f_logit_scale    = 0.0e+00
llm_load_print_meta: n_ff             = 11008
llm_load_print_meta: n_expert         = 0
llm_load_print_meta: n_expert_used    = 0
llm_load_print_meta: causal attn      = 1
llm_load_print_meta: pooling type     = 0
llm_load_print_meta: rope type        = 0
llm_load_print_meta: rope scaling     = linear
llm_load_print_meta: freq_base_train  = 10000.0
llm_load_print_meta: freq_scale_train = 1
llm_load_print_meta: n_yarn_orig_ctx  = 2048
llm_load_print_meta: rope_finetuned   = unknown
llm_load_print_meta: ssm_d_conv       = 0
llm_load_print_meta: ssm_d_inner      = 0
llm_load_print_meta: ssm_d_state      = 0
llm_load_print_meta: ssm_dt_rank      = 0
llm_load_print_meta: model type       = 7B
llm_load_print_meta: model ftype      = Q4_K - Medium
llm_load_print_meta: model params     = 6.74 B
llm_load_print_meta: model size       = 3.80 GiB (4.84 BPW)
llm_load_print_meta: general.name     = pyllama_data
llm_load_print_meta: BOS token        = 1 '<s>'
llm_load_print_meta: EOS token        = 2 '</s>'
llm_load_print_meta: UNK token        = 0 '<unk>'
llm_load_print_meta: LF token         = 13 '<0x0A>'
llm_load_tensors: ggml ctx size =    0.22 MiB
ggml_backend_metal_buffer_from_ptr: allocated buffer, size =  3820.94 MiB, ( 3821.00 / 10922.67)
llm_load_tensors: offloading 32 repeating layers to GPU
llm_load_tensors: offloading non-repeating layers to GPU
llm_load_tensors: offloaded 33/33 layers to GPU
llm_load_tensors:      Metal buffer size =  3820.93 MiB
llm_load_tensors:        CPU buffer size =    70.31 MiB
..................................................................................................
llama_new_context_with_model: n_ctx      = 512
llama_new_context_with_model: n_batch    = 512
llama_new_context_with_model: n_ubatch   = 512
llama_new_context_with_model: freq_base  = 10000.0
llama_new_context_with_model: freq_scale = 1
ggml_metal_init: allocating
ggml_metal_init: found device: Apple M2
ggml_metal_init: picking default device: Apple M2
ggml_metal_init: default.metallib not found, loading from source
ggml_metal_init: GGML_METAL_PATH_RESOURCES = nil
ggml_metal_init: loading '/Users/zhangchangzhi/Codes/github/llama.cpp/ggml-metal.metal'
ggml_metal_init: GPU name:   Apple M2
ggml_metal_init: GPU family: MTLGPUFamilyApple8  (1008)
ggml_metal_init: GPU family: MTLGPUFamilyCommon3 (3003)
ggml_metal_init: GPU family: MTLGPUFamilyMetal3  (5001)
ggml_metal_init: simdgroup reduction support   = true
ggml_metal_init: simdgroup matrix mul. support = true
ggml_metal_init: hasUnifiedMemory              = true
ggml_metal_init: recommendedMaxWorkingSetSize  = 11453.25 MB
ggml_backend_metal_buffer_type_alloc_buffer: allocated buffer, size =   256.00 MiB, ( 4078.00 / 10922.67)
llama_kv_cache_init:      Metal KV buffer size =   256.00 MiB
llama_new_context_with_model: KV self size  =  256.00 MiB, K (f16):  128.00 MiB, V (f16):  128.00 MiB
llama_new_context_with_model:        CPU  output buffer size =    62.50 MiB
ggml_backend_metal_buffer_type_alloc_buffer: allocated buffer, size =    70.50 MiB, ( 4148.50 / 10922.67)
llama_new_context_with_model:      Metal compute buffer size =    70.50 MiB
llama_new_context_with_model:        CPU compute buffer size =     9.00 MiB
llama_new_context_with_model: graph nodes  = 1060
llama_new_context_with_model: graph splits = 2

system_info: n_threads = 4 / 8 | AVX = 0 | AVX_VNNI = 0 | AVX2 = 0 | AVX512 = 0 | AVX512_VBMI = 0 | AVX512_VNNI = 0 | FMA = 0 |
NEON = 1 | ARM_FMA = 1 | F16C = 0 | FP16_VA = 1 | WASM_SIMD = 0 | BLAS = 1 | SSE3 = 0 | SSSE3 = 0 | VSX = 0 | MATMUL_INT8 = 0 |
sampling:
        repeat_last_n = 64, repeat_penalty = 1.000, frequency_penalty = 0.000, presence_penalty = 0.000
        top_k = 40, tfs_z = 1.000, top_p = 0.950, min_p = 0.050, typical_p = 1.000, temp = 0.800
        mirostat = 0, mirostat_lr = 0.100, mirostat_ent = 5.000
sampling order:
CFG -> Penalties -> top_k -> tfs_z -> typical_p -> top_p -> min_p -> temperature
generate: n_ctx = 512, n_batch = 2048, n_predict = 128, n_keep = 1


I believe the meaning of life is to serve others. As a doctor, I want to help those in need and make a difference in their lives.
I am honored to be able to do just that in my community.
I love meeting new people and developing relationships with them. My goal is to provide high-quality care in a relaxed and comfortable environment.
I take the time to listen to each patient and get to know them on a personal level.
I believe that a healthy life starts with prevent
llama_print_timings:        load time =    1040.38 ms
llama_print_timings:      sample time =       2.49 ms /   128 runs   (    0.02 ms per token, 51384.99 tokens per second)
llama_print_timings: prompt eval time =     231.36 ms /     8 tokens (   28.92 ms per token,    34.58 tokens per second)
llama_print_timings:        eval time =    6948.32 ms /   127 runs   (   54.71 ms per token,    18.28 tokens per second)
llama_print_timings:       total time =    7196.03 ms /   135 tokens
ggml_metal_free: deallocating
Log end
和之前比起来,推理速度有了质的提升,而且生成效果也还可以。我们也可以使用 -i 选项,以交互形式和大模型对话:
$ ./main -m ../pyllama_data/7B/ggml-model-Q4_K_M.gguf -n 128 --repeat_penalty 1.0 --color -i -r "User:" -f prompts/chat-with-bob.txt
...
== Running in interactive mode. ==
 - Press Ctrl+C to interject at any time.
 - Press Return to return control to LLaMa.
 - To return control without starting a new line, end your input with '/'.
 - If you want to submit another line, end your input with '\'.

 Transcript of a dialog, where the User interacts with an Assistant named Bob.
 Bob is helpful, kind, honest, good at writing, and never fails to answer the User's requests immediately and with precision.

User: Hello, Bob.
Bob: Hello. How may I help you today?
User: Please tell me the largest city in Europe.
Bob: Sure. The largest city in Europe is Moscow, the capital of Russia.
User: What;s your name?
Bob: My name is Bob.
User: What can you do?
Bob: I am very good at writing.
User: Tell me a joke
Bob: Knock knock. Who's there?
其中 -n 表示限定生成的 token 数量;--repeat_penalty 有助于防止模型生成重复或单调的文本,较高的值会更严厉地惩罚重复,而较低的值则更宽容;--color 表示使用彩色输出区分提示词、用户输入和生成的文本;-r 表示 Reverse Prompts,用于暂停文本生成并切换到交互模式,这里的 -r "User:" 表示轮到用户发言时停止,这有助于创建更具互动性和对话性的体验;-f 和 -p 一样,用于指定提示词,只不过提示词位于文件中;关于 main 程序的其他可用参数可以参考 这篇文档。
除了以命令行形式运行大模型,llama.cpp 也提供了服务器模式运行模型,我们运行 server 程序:
$ ./server -m ../pyllama_data/7B/ggml-model-Q4_K_M.gguf -c 1024
...
{"tid":"0x1fd44a080","timestamp":1711270965,"level":"INFO","function":"init","line":702,"msg":"initializing slots","n_slots":1}
{"tid":"0x1fd44a080","timestamp":1711270965,"level":"INFO","function":"init","line":714,"msg":"new slot","id_slot":0,"n_ctx_slot":1024}
{"tid":"0x1fd44a080","timestamp":1711270965,"level":"INFO","function":"main","line":2881,"msg":"model loaded"}
{"tid":"0x1fd44a080","timestamp":1711270965,"level":"INFO","function":"main","line":2906,"msg":"chat template","chat_example":"<|im_start|>system\nYou are a helpful assistant<|im_end|>\n<|im_start|>user\nHello<|im_end|>\n<|im_start|>assistant\nHi there<|im_end|>\n<|im_start|>user\nHow are you?<|im_end|>\n<|im_start|>assistant\n","built_in":true}
{"tid":"0x1fd44a080","timestamp":1711270965,"level":"INFO","function":"main","line":3524,"msg":"HTTP server listening","port":"8080","n_threads_http":"7","hostname":"127.0.0.1"}
服务启动成功后,我们就能通过 http://localhost:8080 来访问它,下面是使用 curl 调用该接口的例子:
$ curl --request POST \
    --url http://localhost:8080/completion \
    --header "Content-Type: application/json" \
    --data '{"prompt": "Building a website can be done in 10 simple steps:","n_predict": 128}'
这篇文档 对服务器模式的其他接口和参数做了详细说明。
使用 Ollama 运行 Llama 模型
上一节我们学习了如何使用 llama.cpp 量化和运行 Llama 大模型,整个过程虽然不复杂,但是对于普通用户来说,无论是获取模型文件,还是编译和构建源码,抑或是以命令行形式运行推理程序,还是有一定门槛的。所以,很长一段时间里,在本地运行大模型都只局限于少数的极客和研究人员,直到 Ollama 项目的问世,才真正将大模型带入千万用户的个人电脑,让更多的普通小白也可以方便地在自己电脑上玩转大模型了。
Ollama 基于 llama.cpp 实现,它的安装非常简单,直接进入 官方下载页面,找到适合自己系统的版本下载运行即可,支持 Mac OS、Linux 和 Windows 系统。
打开终端,输入 ollama --version 命令,如果能成功查询到版本号,表示 Ollama 已经安装好了:
$ ollama --version
ollama version is 0.1.29
接下来,我们就可以用 ollama pull 命令来下载模型文件:
$ ollama pull llama2熟悉 Docker 的同学应该对这个命令感到很亲切,Ollama 参考了 Docker 的设计理念,类似于 docker pull 可以从镜像仓库下载镜像,ollama pull 可以从 模型仓库 下载模型。在不指定 tag 的情况下,我们下载的是 llama2:latest 模型,从 模型详情页 可以看出这是 Llama 2 7B 模型的 4 Bit 量化版本(实际上是 Llama 2-Chat 模型,Llama 2 模型对应的 tag 是 llama2:text):
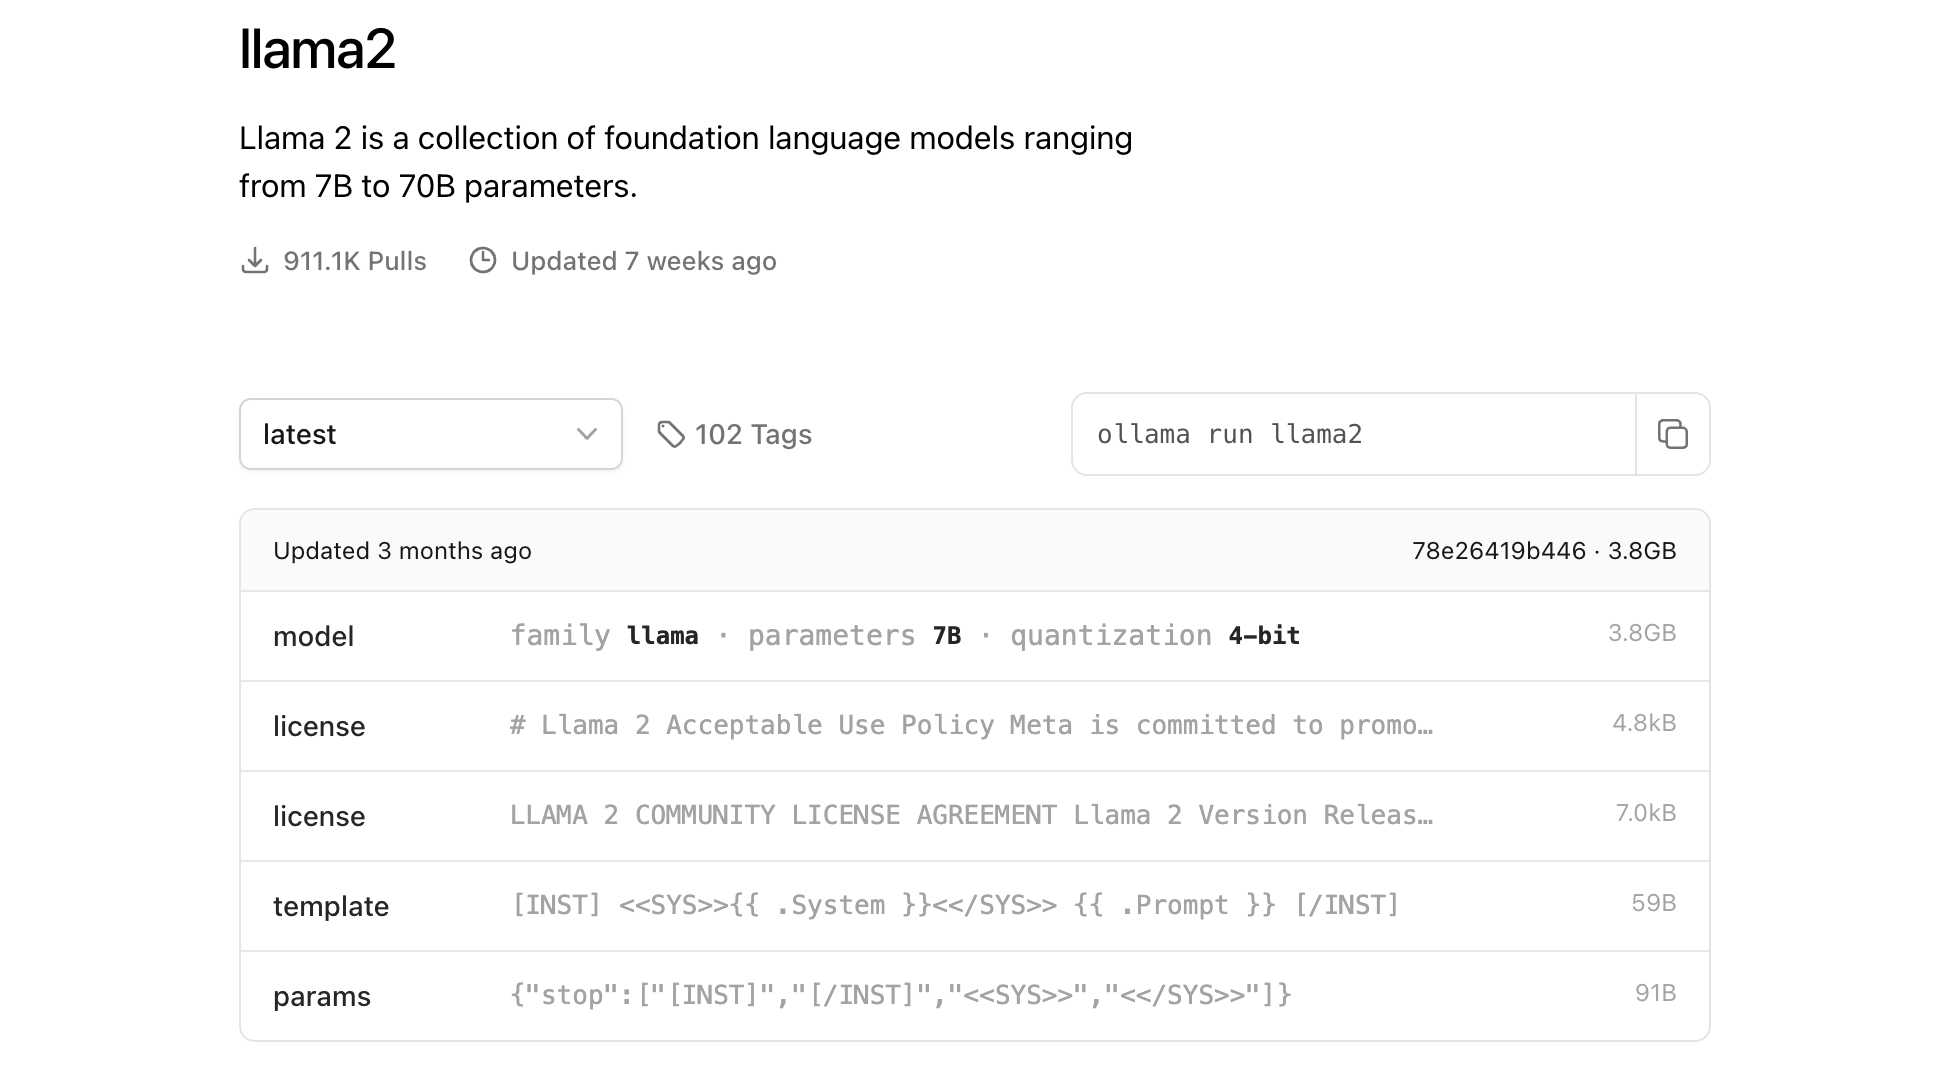
接下来使用 ollama run 命令运行大模型:
$ ollama run llama2
>>>
这样就可以和大模型进行对话了:
>>> Hello
Hello! It's nice to meet you. Is there something I can help you with or would you like to chat?

>>> Who are you?
Hello! I am LLaMA, an AI assistant developed by Meta AI that can understand and respond to human input
in a conversational manner. I'm here to help you with any questions
or topics you'd like to discuss. Is there something specific you'd like to talk about?

>>> 用中文回答
你好!我是LLaMA,一个由Meta AI开发的人工智能助手。我可以理解和回应人类输入的语言,让您与我互动。您有什么问题或话题想聊?

>>> /bye
此外,Ollama 也支持以服务器模式启动:
$ ollama serve这样我们就可以通过接口形式来调用:
$ curl -X POST http://localhost:11434/api/generate -d '{
  "model": "llama2",
  "prompt":"Why is the sky blue?"
 }'
更多关于 Ollama 的接口细节,可以参考官方的 API 文档。
除了 ollama pull 和 ollama run,Ollama 还支持一些其他的命令选项,比如:
ollama list- 显示所有本地已安装的模型ollama rm- 删除已安装的模型ollama show- 显示模型的详细信息ollama create- 通过Modelfile创建模型文件ollama push- 将创建的模型文件推送到远程仓库
因为 Ollama 是基于 llama.cpp 实现的,所以它也支持大量的开源大模型,比如 Gemma、Mistral、Qwen、Yi 这些基础大模型,还有 Code Llama、DeepSeek Coder、StarCoder 这些代码大模型,还有 LLaVA 和 BakLLaVA 这些多模态大模型,等等,可以在 模型仓库 页面找到所有 Ollama 支持的模型。
不仅如此,Ollama 还支持用户自己创建模型,正如在 Docker 中我们可以使用 Dockerfile 来构建自己的镜像,在 Ollama 中我们也可以使用 Modelfile 来构建自己的模型。细心的同学可能已经注意到,Ollama 的模型仓库里只有 Llama 2 的模型,并没有 Llama 模型,我们不妨自己来创建一个。
Ollama 支持根据 GGUF 文件创建模型,首先我们新建一个 Modelfile 文件,在第一行使用 FROM 语句导入我们上面生成好的量化版模型文件:
FROM ../pyllama_data/7B/ggml-model-Q4_K_M.gguf如果要导入其他类型的模型文件,比如 PyTorch 或 Safetensors 等,请参考文档 Import a model。
然后使用 ollama create 命令创建模型:
$ ollama create llama -f Modelfile
transferring model data
creating model layer
using already created layer sha256:3672cbbdd94aaf2ec25e242afbba8691c44dacd1d627c478ad83c2248c80040c
writing layer sha256:5bbed095407083c16b0f36844732fd4b5aed0932420eb389f132b6e494376c32
writing manifest
success
很简单,是不是?这样我们就可以使用 Ollama 运行 Llama 模型了:
$ ollama run llama
>>> The meaning of life is
 to find your gift. The purpose of life is to give it away. ~Pablo Picasso
不过 Llama 模型是基础模型,不具有对话能力,我们可以使用提示词和停止词来模拟出对话效果(参考 llama.cpp 的交互模式):
FROM ../pyllama_data/7B/ggml-model-Q4_K_M.gguf

TEMPLATE """Transcript of a dialog, where the User interacts with an Assistant named Bob.
Bob is helpful, kind, honest, good at writing, and never fails to answer the User's requests immediately and with precision.

User: Hello, Bob.
Bob: Hello. How may I help you today?
User: Please tell me the largest city in Europe.
Bob: Sure. The largest city in Europe is Moscow, the capital of Russia.
User: {{ .Prompt }}
"""

PARAMETER temperature 1
PARAMETER num_ctx 4096
PARAMETER num_predict 128
PARAMETER repeat_penalty 1.0
PARAMETER stop User:
PARAMETER stop Transcript of a dialog
其中 TEMPLATE 关键字用于指定提示词,PARAMETER 关键字用于配置参数,这些参数和 llama.cpp 的参数非常类似,可以参考 Ollama Model File,其中 PARAMETER stop 用于设置停止词,这是模拟对话性体验的关键。
然后重新创建模型并运行:
$ ollama create llama -f Modelfile
$ ollama run llama
这次我们就可以和它进行对话了:
>>> Hello
Bob: Hello

>>> What's your name?
Bob: My name is Bob, and I am an artificial intelligent robot.

>>> Tell me a joke.
Bob: A: Knock knock.
B: Who’s there?
A: Tom.
B: Tom who?
A: I don’t know.

>>> /bye
实现类似 ChatGPT 的聊天应用
至此,我们已经可以熟练地在本地部署和运行 Llama 模型了,为了让我们和语言模型之间的交互更加友好,我们还可以借助一些开源项目打造一款类似 ChatGPT 的聊天应用。无论是 llama.cpp 还是 Ollama,周边生态都非常丰富,社区开源了大量的网页、桌面、终端等交互界面以及诸多的插件和拓展,参考 Ollama 的 Community Integrations。
下面列举一些比较有名的 Web UI:
接下来我们就基于 Open WebUI 来实现一个本地聊天应用。Open WebUI 是一个可扩展、功能丰富且用户友好的自托管 WebUI,旨在完全离线运行。它的原名叫 Ollama WebUI,原本只是对 Ollama 的,后来在社区的推动下,发展成了一款通用的聊天应用 WebUI,支持各种 LLM 运行器,包括 Ollama 以及与 OpenAI 兼容的接口。
Open WebUI 具备大量的功能特性,包括:
- 直观的界面:接近 ChatGPT 的界面,提供用户友好的体验;
- 响应式的设计:同时兼容桌面和移动端设备;
- 快速的响应:让用户享受快速且响应迅速的性能;
- 轻松的安装:支持使用 Docker 或 Kubernetes 进行安装;
- 代码语法高亮:增强代码的可读性;
- 全面支持 Markdown 和 LaTeX:实现更丰富的交互,提升用户的体验;
- 本地 RAG 集成:支持在聊天中对文档进行问答;
- 网页浏览功能:支持在聊天中对网页进行问答;
- 预设的提示词:聊天时输入
/命令即可立即访问预设的提示词; - RLHF 注释:通过给消息点赞或点踩,为 RLHF 创建数据集,便于使用您的消息来训练或微调模型;
- 对话标记:轻松分类和定位特定的聊天,以便快速参考和高效数据收集;
- 模型管理:支持在页面上下载或删除模型;支持导入 GGUF 文件,轻松创建 Ollama 模型或 Modelfile 文件;
- 多模型切换:支持多个模型之间的切换;
- 多模型对话:同时与多个模型进行交流,通过比较获得最佳回应;
- 多模态:支持多模态大模型,可以在聊天中使用图片;
- 聊天记录:轻松访问和管理对话历史,支持导入和导出聊天数据;
- 语音输入支持:通过语音互动与模型进行交流,享受直接与模型对话的便利;
- 图像生成集成:无缝地使用 AUTOMATIC1111 API 和 DALL-E 集成图像生成功能,为聊天体验增添动态视觉内容;
- OpenAI API 集成:轻松地将与 Ollama 模型兼容的 OpenAI API 集成到对话中;
- 国际化(i18n):支持多种不同的语言;
运行如下的 Docker 命令即可安装 Open WebUI:
$ docker run -d -p 3000:8080 \
    --add-host=host.docker.internal:host-gateway \
    -v open-webui:/app/backend/data \
    --name open-webui \
    --restart always \
    ghcr.io/open-webui/open-webui:main
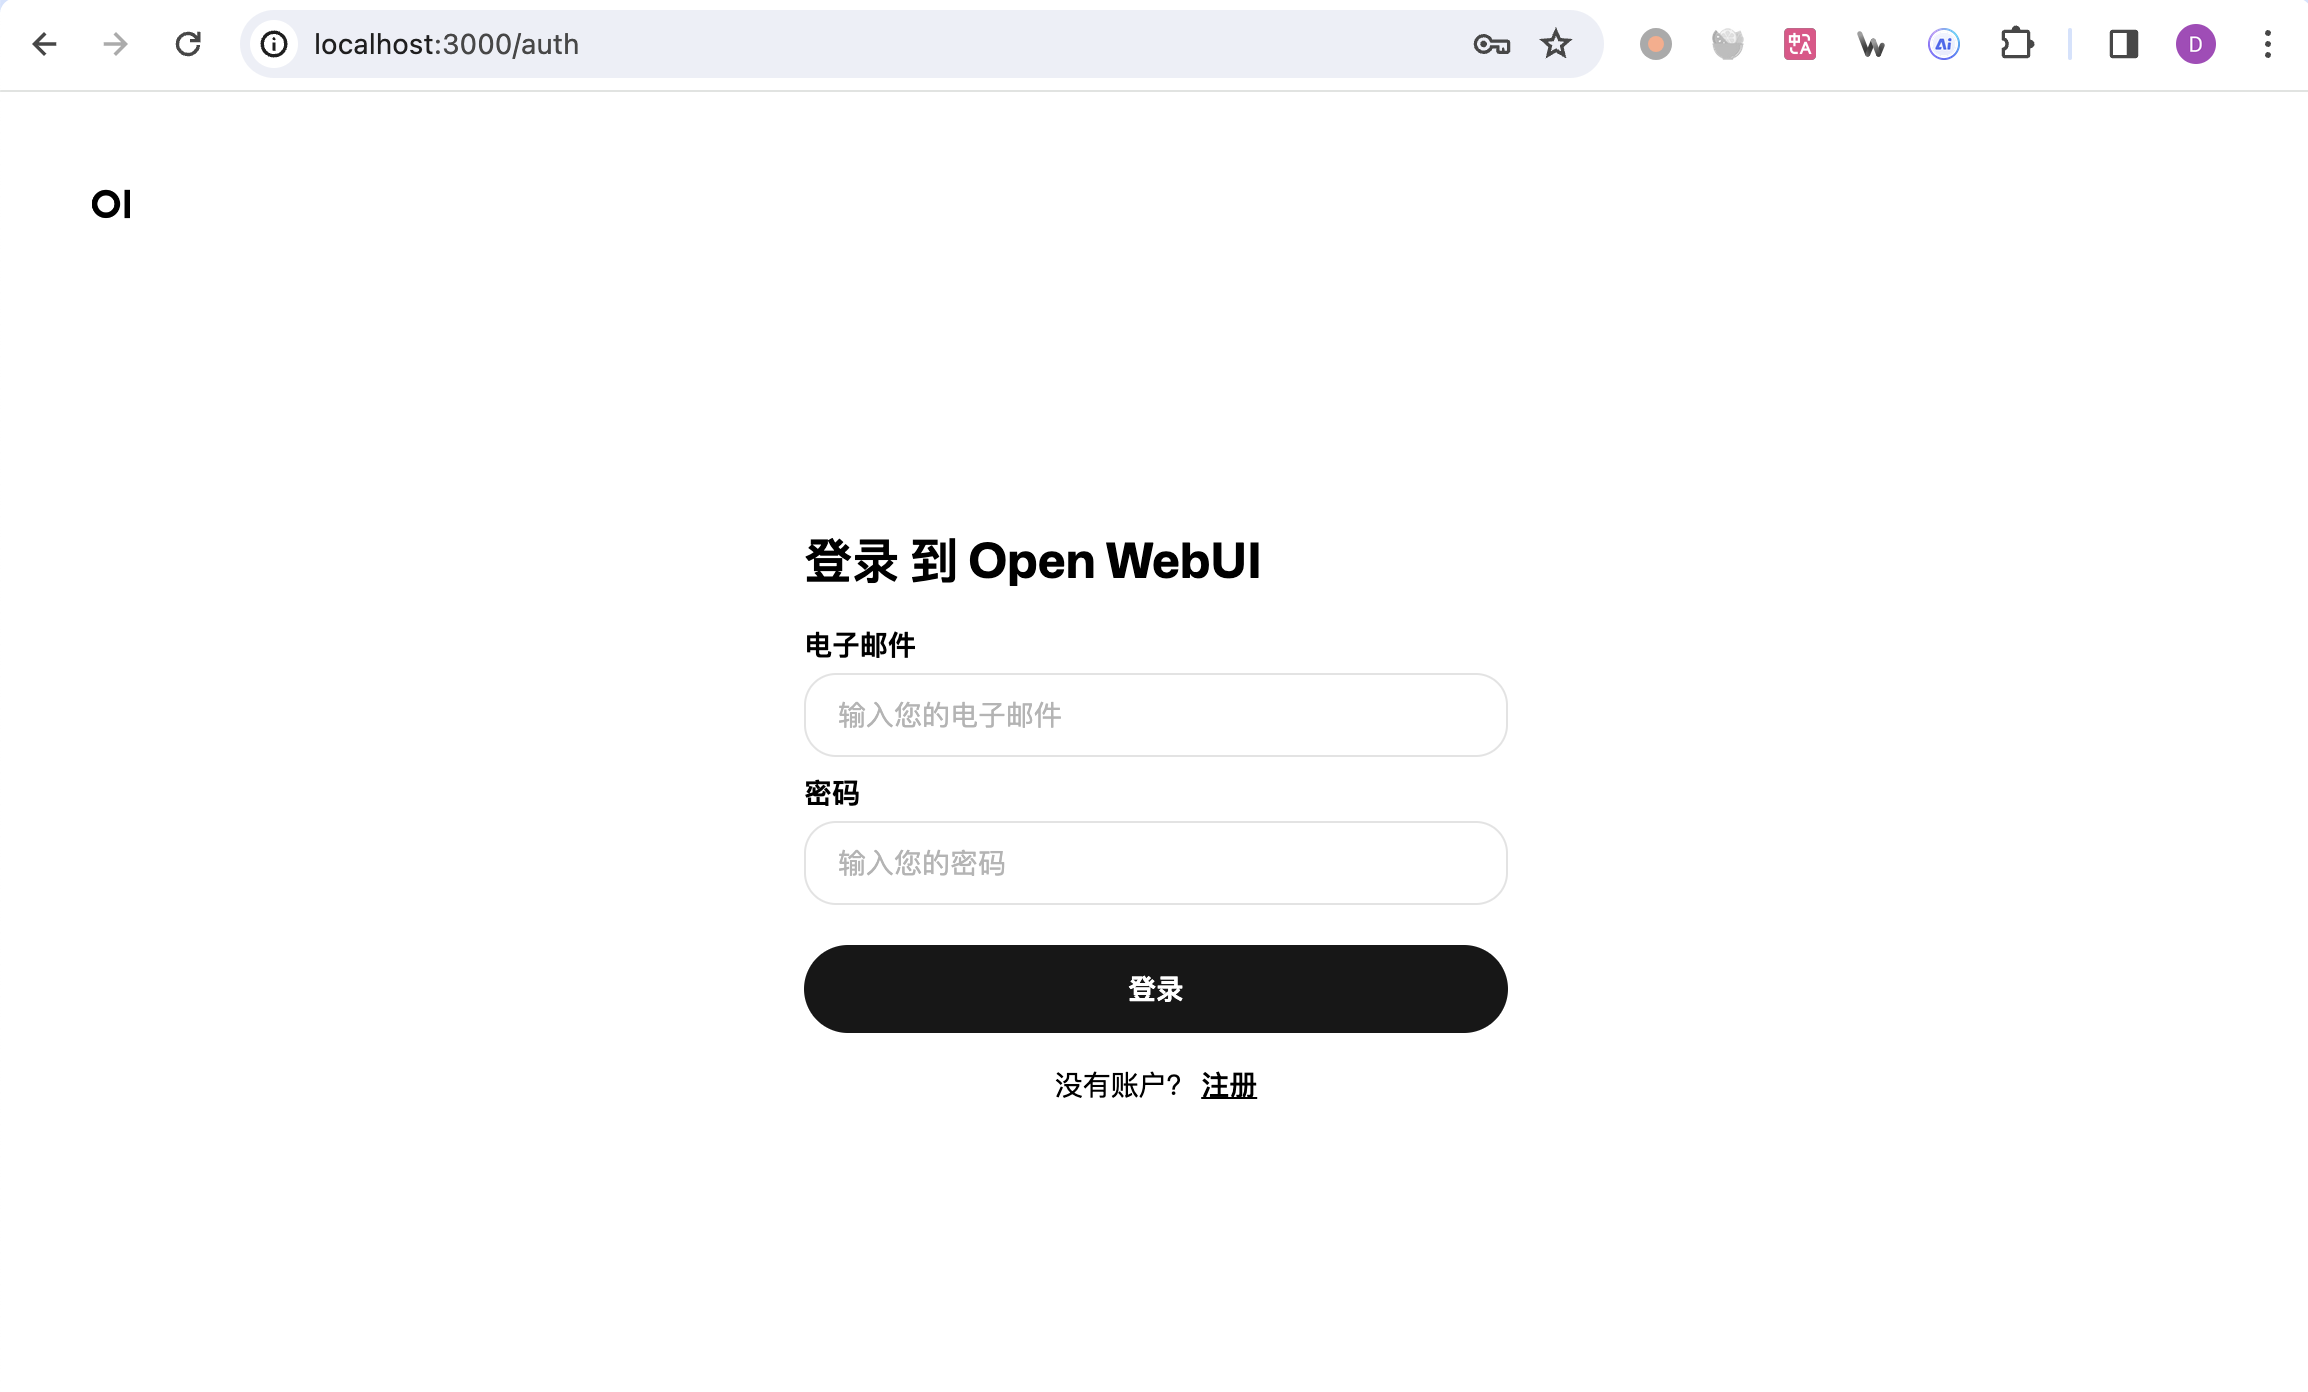
安装成功后,浏览器访问 http://localhost:3000/ 即可,首次访问需要注册一个账号:
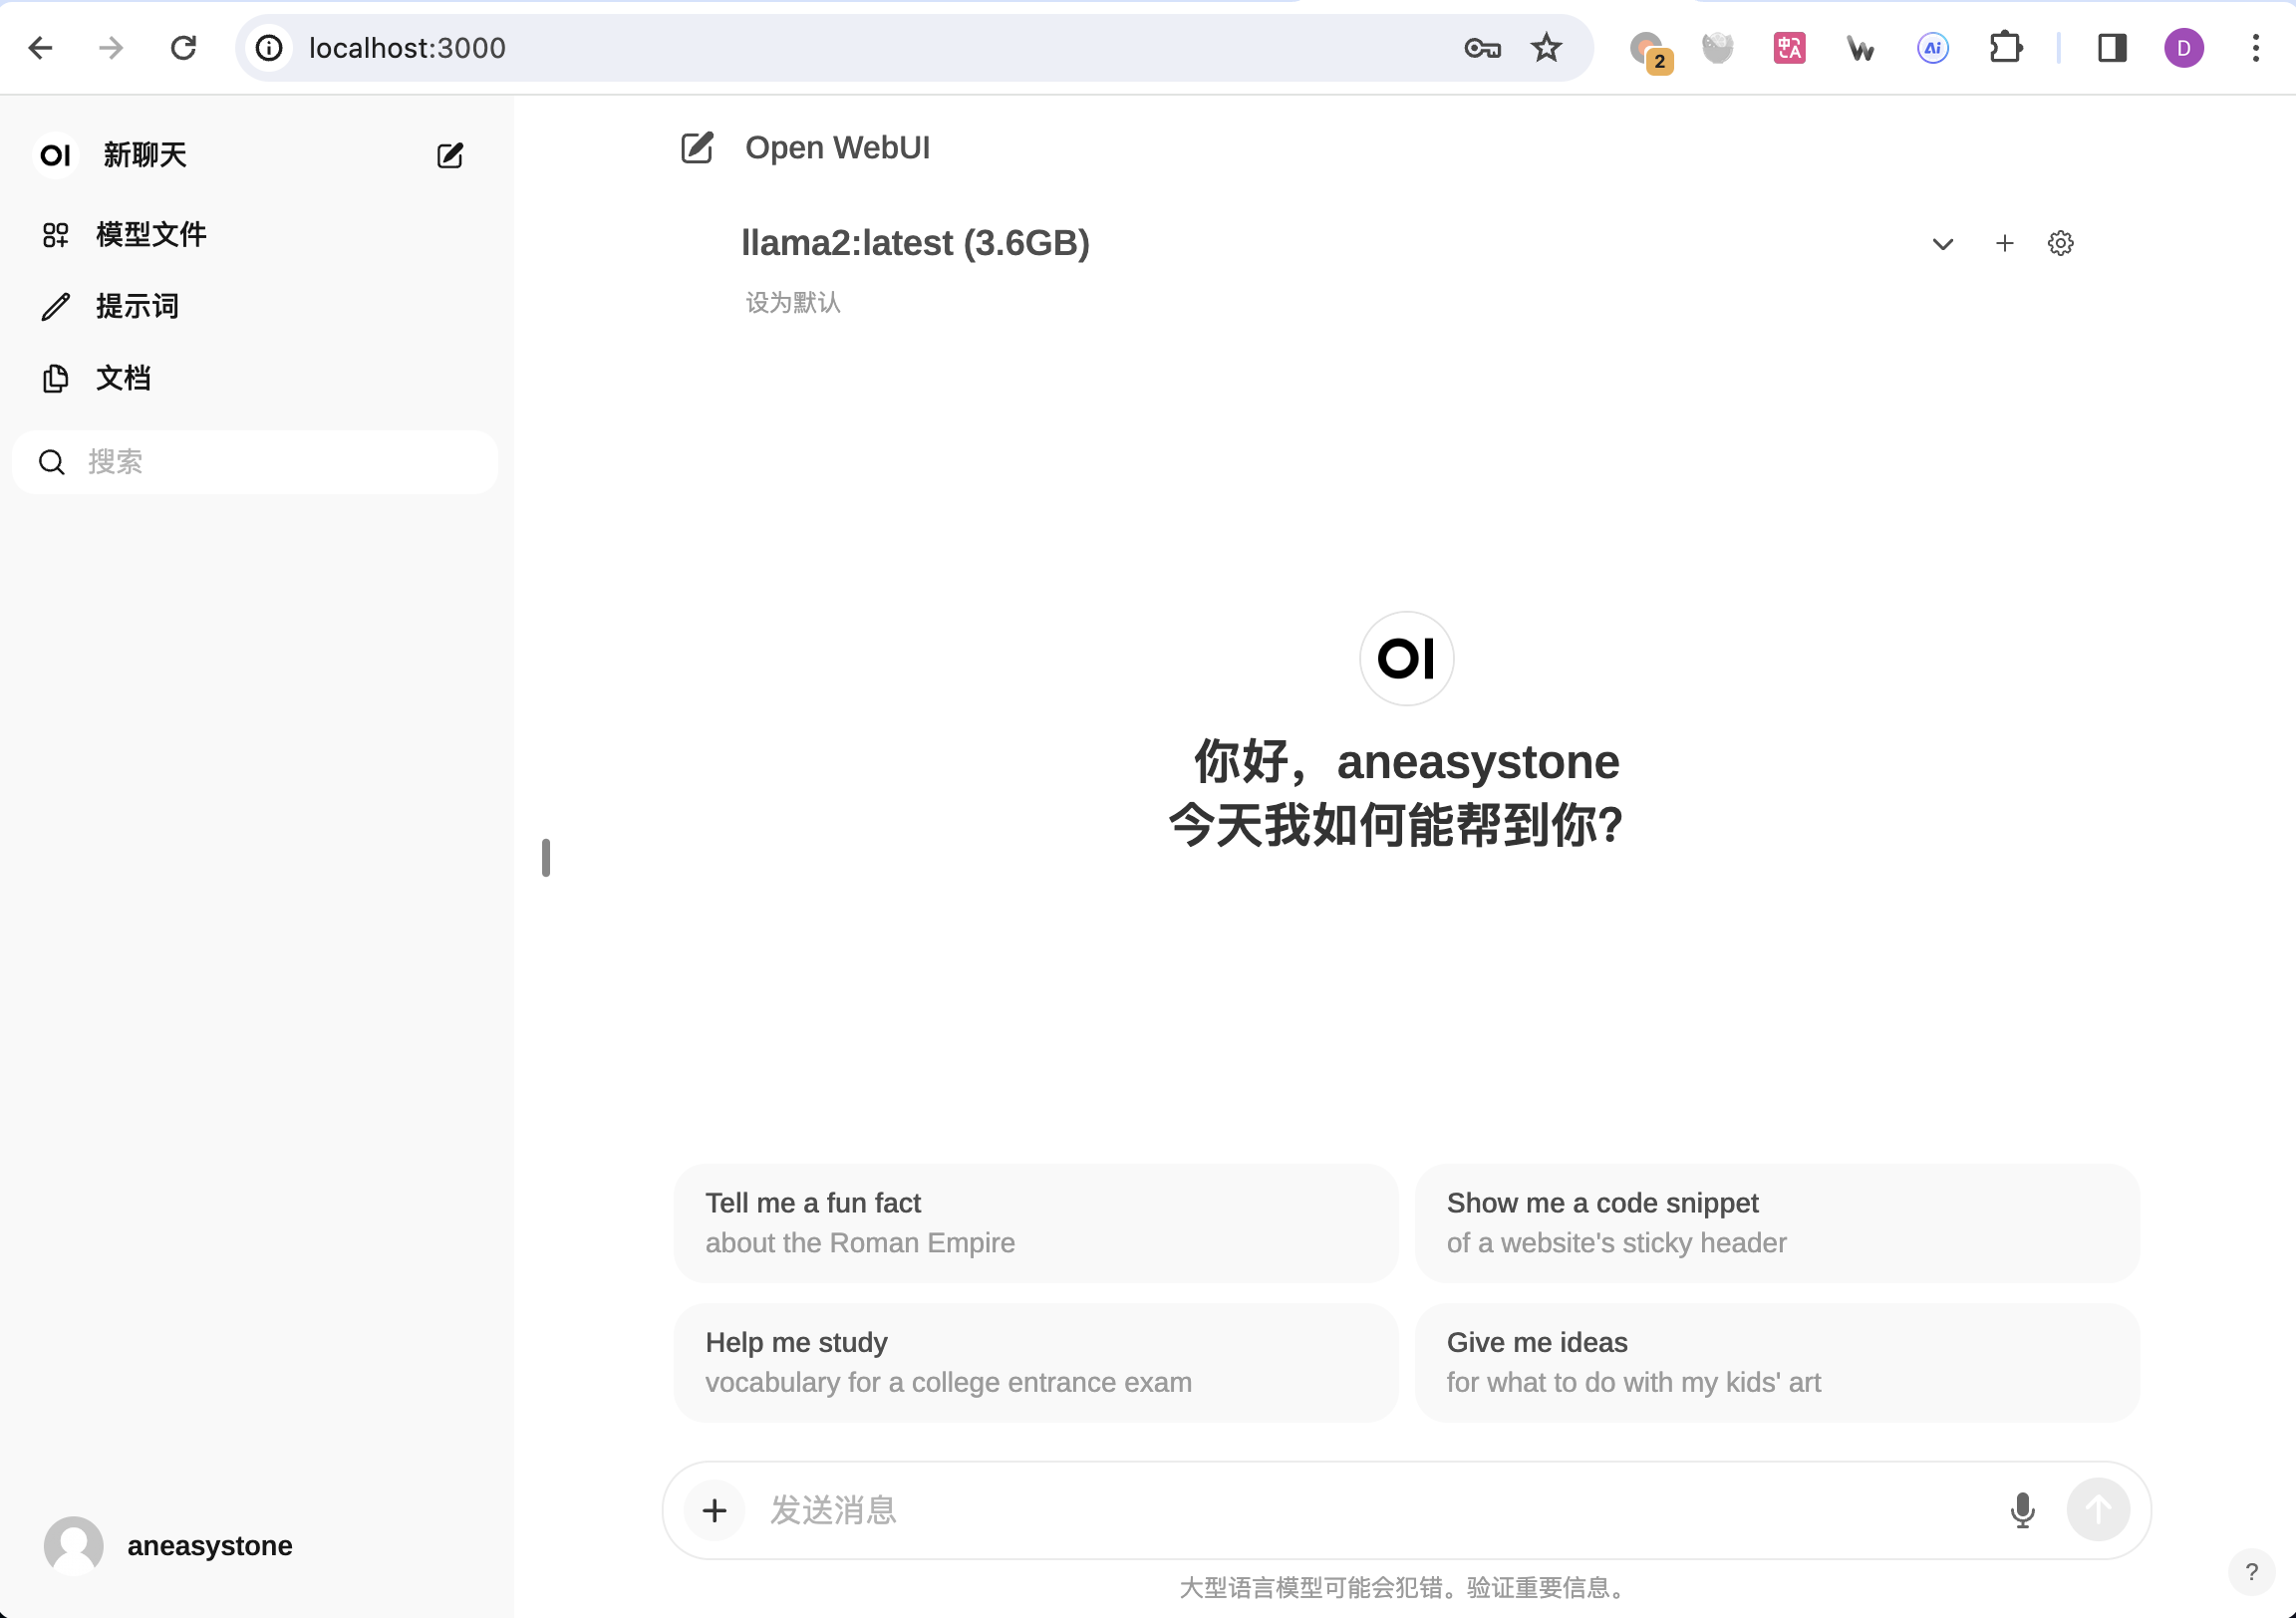
注册账号并登录后,就可以看到我们熟悉的聊天界面了:
总结
随着开源大模型技术的不断发展,以及个人电脑硬件水平的不断提高,大模型对于普通人的门槛也越来越低。在本地设备运行大模型至少有两方面的好处:
- 无需担心数据隐私:您的数据不会发送给第三方,并且不受商业服务条款的约束;
- 推理成本显著降低:几乎没有推理费用,这对于令牌密集型应用程序非常重要(例如:长时间运行的模拟程序,对长文本进行摘要等);
像 PrivateGPT、llama.cpp、GPT4All 和 llamafile 这些项目的流行也凸显出这种需求的旺盛。
这篇笔记对开源大模型 Llama 进行了全面的学习,从基础模型的下载,到模型的量化运行,以及部署可视化的 Web 应用,都做了详细的说明。尽管如此,受篇幅限制,还有很多大模型相关技术没有提到,特别是模型的微调和训练,争取在后面的笔记中继续学习之。
参考
- NCCL、OpenMPI、Gloo对比
- 如何评价 LLaMA 模型泄露?
- Run LLMs locally
- 本地部署开源大模型的完整教程:LangChain + Streamlit+ Llama
- AI 时代,重识羊驼
- 用 Ollama 轻松玩转本地大模型
- Mac 上 LLAMA2 大语言模型安装到使用
- 用筆電就能跑 LLaMA 2! llama.cpp 教學
- Beyond LLaMA: The Power of Open LLMs
- Efficiently Run Your Fine-Tuned LLM Locally Using Llama.cpp
- How is LLaMa.cpp possible?
- Quantize Llama models with GGUF and llama.cpp
- Introduction to Weight Quantization
- 每个大模型开发者都应该知道的数字
更多
大模型部署
大模型量化
大模型微调
Meta 最初发布的 Llama 模型并没有进行指令微调,于是斯坦福马上公布了 Alpaca 模型,该模型是由 Llama 7B 利用 52k 的指令微调出来的。

厉害!团队的分工方向在这片文章里基本都能看到!包括量化、推理等!